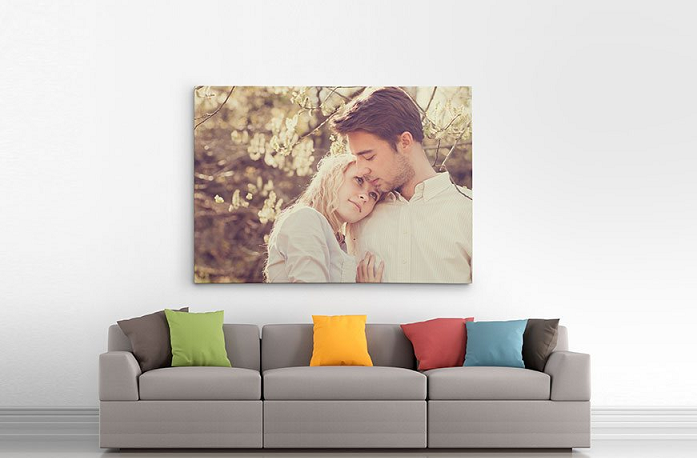
Hang Your Canvas Prints In 7 Ways
Setting up a piece of art on your walls is the most natural thing, isn’t it? Well, it must be many things but not easy. What seems easy actually requires a few nails, a hammer and a couple of right-forced hits. But they usually end up with a cracked wall or crooked picture view hiding an unappealing hole behind. Hanging a canvas print demands a lot of know-how. So here’s an article for you to get all your expertise!
Ready-Made Hanger Set? Best Option
Do not second guess if a physical store or an online store offers you the option to attached a hanger set on their own. A few bucks here and there in this will save you from a lot of pain of manually making a hanger for the wall. It will spare from a lot of potential troubles and also save the money needed to repair your wall if you break it. Ready-made hardware hanger set usually come in a combination of simple tools that lets you set up your print with optimised stability.
Use Adhesives to Hang Your Canvas
 1. Adhesive Strips or Hooks:
The keyword here is adhesion. Adhesive strips or hooks will spare your wall from any visual damage. Use some isopropyl alcohol to clean the surface before using an adhesive on the wall. Always make sure that you have the right number of hooks or strips for your canvas depending upon the size and weight of the art piece.
Depending upon the size, adhesive hooks are capable enough to hold the weight of canvas from 0.45 to 3.6 kg. Make sure that you distribute the hooks evenly, so a single hook doesn’t get too much pressure. On the other hand, when used adhesive strips, attach the canvas to the adhesive only for 30 seconds and then remove it only to attach it after an hour has passed. Despite whichever sticky tool you use, both require the canvas to be pressed for 30 seconds to make them set well on the wall.
2. Mounting Tape:

Another option in adhesives is mounting tape. This is only applied to wall art that is light in weight. Double-Sided tape can come handy too but only if your decor item does not exceed 500gm limit. You can even use adhesive to attach wooden panels. This way, you can get to display your custom-made photo canvas in whichever way you want on a regular shelf.
3. Velcro:
The all-time favourite and popular Velcro, can also let you not destroy your walls unintentionally. Use super glue or adhesive tape to attach the Velcro to both - the frame and the Velcro. Velcro is a well-tested option to keep your wall art firmly fixed to where you want it to be. A gentle note: the super glue option might require a little paint job later once the canvas and Velcro are removed.
Other Non-Intrusive Methods
Well, these are some of the conventional techniques to use to hang your personalised canvas prints. But did you know we have more unique tricks to make your prints look super awesome in your living space? You’d need a few ingredients for such amazing hanging techniques we are about to mention though. Do you have a decorative moulding on your wall? Or perhaps some neat-looking colourful craft wires? Well, such small components can also make a huge difference when it comes to creating a fantastic wall decor without putting a single hole in the wall.
Free Tip - Just tie wire to an S-shaped hook and hang your wall art by the moulding. This idea would look fantastic in rustic or vintage interiors!
1. Grid-Like Furnishings
 You can even think one step ahead when you are searching for some new interior decorating solutions. Grid furnishings on your wall will look great and also give you an additional space to showcase several art pieces instead of just one. It might be odd, but you can use clamp hanger or pegs depending upon the size of the canvas to give a completely new feeling to the whole view. Plus a significant point that puts you at ease is that the wooden models will complement the canvas and the grid structure on the wall. Win-win!
2. Pegboard
A pegboard is an ingenious solution for a non-intrusive technique. It’s a good substitute for regular was in case if you want to have a temporary canvas gallery wall or a wall for maintenance tools. It acts as a sweet and straightforward mobile section that you can move from one wall to another in your house. A pegboard covers many ways of attaching your canvas. You can either put adhesive hooks on the canvas and tie them up from the other side of the board. Or, simply use regular iron hooks to give a clean look to your canvas.
3. Corkboard
 Corkboard is another creative deviation that let you have a unique wall exclusively reserved for your custom-made photo canvas. Just obtain a cork board bulletin that has a thickness of at least 2cm, and you are good to go! Make as many holes as you want without sacrificing the actual wall while placing your canvas! It would require a little nail-hammer workout, but the best part is that you don’t get to lose anything.
4. Easel
If you notice carefully, nowadays, a lot of modern interiors use an easel as a beautiful decorative element. And it is for a reason too. It not only gives your room a feeling of an artistic touch but also it’s a brilliant way to display your precious canvas size photo without damaging or affecting any surface areas of your room. A fabulous easel stand with a sizeable canvas on it will make the environment look more inspired!
There are individual hardware sets available at Canvas Champ where you can choose to opt them to make hanging your canvas art with comfort. Although, if any of the methods we mentioned above make you want to work out your body, then surely go for it! However, make sure you know how to find good quality and durable canvas prints before you go in full DIY mode. We wouldn’t want to see you damage your artwork in any way! Happy Canvas Hanging!


